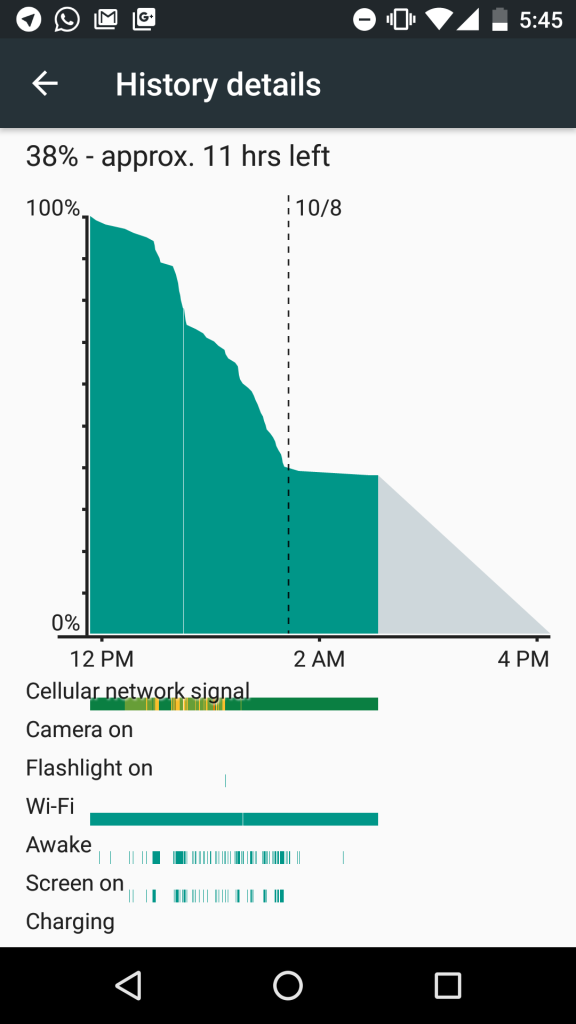
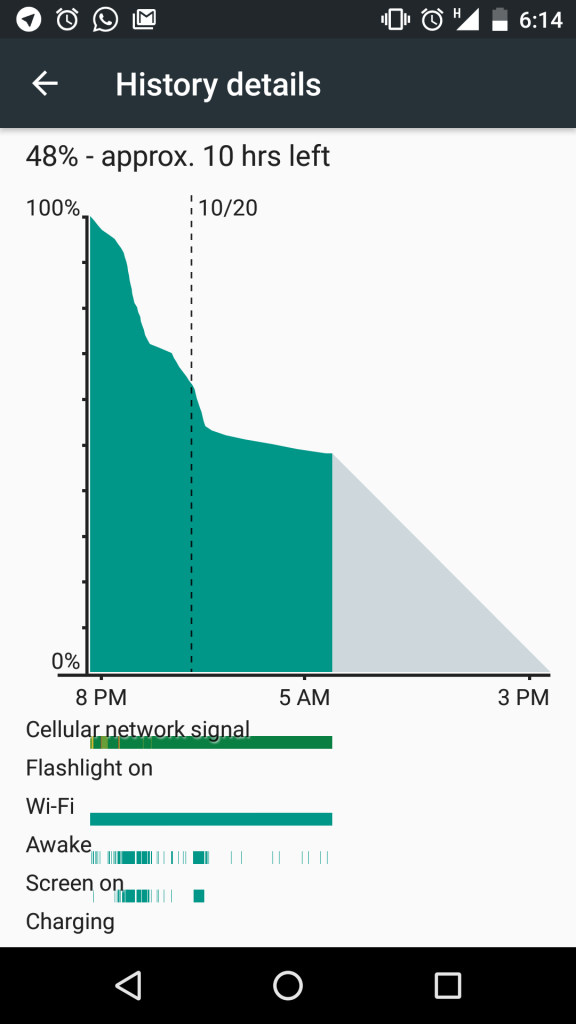
Google has acknowledged the battery problem on Android devices and we have seen multiple attempts from them to fix it. Project Volta was introduced in Android Lollipop as an attempt to reduce the battery drain on smartphones. Project Volta introduced a “Battery Historian” that would keep a tab on the battery consumption by various apps. On the backend, a Job Scheduler API was used to schedule the processor time each app would do to minimize consumption.
Smartphone manufacturers like HTC and Samsung have been doing this for a long time now by shutting down unnecessary processes, slowing down refresh rates, slowing down to CPU and even disabling data in some cases. Project Volta didn’t really make wonders to the battery life hence Google introduced Android Doze.
The battery life on Android Marshmallow running on Nexus 5 post this process
Android Doze is the latest battery saving method available on Android Marshmallow by default. Now Doze is a whole different approach in battery in battery optimization, the OS now takes updates from the accelerometer and gyro to know if the device is active or idle on a desk. When the device is idle for a really long time the net access is disabled, wake locks are ignored and Job Scheduler is not allowed to run. As a result of all these changes, the standby battery life of the device gets a major bump. The Doze feature is available by default on the Nexus 5X and the Nexus 6P. I have seen Doze work on my Nexus 5 and the result is a meager 2% battery drain overnight compared to the 8-10% battery drain on Android Lollipop.
While Doze is very useful to keep the consumption down, it takes time to kick in (around an hour). For those who want aggressive battery saving it is now possible without root via Greenify. This is currently in Beta and those who want to give it a try can follow this procedure. No root is required but USB debugging should be enabled to enable the feature.
For those who do not have USB enabled this is how you do it, for others skip to Step II
Step Set 1: Enabling USB Debugging
The process needs USB debugging to be enabled to help the computer talk to the smartphone. It can be enabled by going to Settings >About phone and scrolling down to the Build Number.
Tapping the Build Number 8 times enables developer options. You’ll need to go to Settings>Developer Options and then Switch USB Debugging on.
Step Set 2: Installing ADB Drivers and running Greenify
Once the Debugging is on, you’ll need to ensure that your computer has Google ADB Drivers. Drivers can be installed from the net or by downloading the Google Android Studio.
Download the Greenify 2.8 Beta from here and install it on your smartphone. After the app is installed the phone, the features need to be enabled via ADB to work properly.
Connect your phone to the computer and it will install the drivers automatically. If it fails to do so, point it to the USB folder in Android Studio and it will install the drivers. After connecting the phone will have popup re
On the computer you’ll need to go to the folder in which the Android Studio is installed. Press and hold the Shift key down and select Open Command Window here. Type in ADB Devices and your phone will be visible there, once it is the following commands are needed to get the permissions required for Greenify to work.
For Aggressive Doze:
“adb -d shell pm grant com.oasisfeng.greenify android.permission.DUMP”
For Wake-up Tracker:
“adb -d shell pm grant com.oasisfeng.greenify android.permission.READ_LOGS”
Once these commands are executed, you can disconnect the phone. There is still one tiny step that is required to enable the function. Launch the Greenify App, hit the three dots in the top right corner, go to Experimental Features and tick Aggressive Doze and it’s done!
This will now help the phone to conserve battery better as it will now push the phone into Doze mode the moment the screen is switched off. I’ve been using this on my Nexus 5 and the standby time has gone up significantly. Do try this if you’ve been struggling with poor battery on your smartphone.


